-
Whatsapp +86 13526654721
-
Email: sales@carmatrolls.com
-
Address: AUX Industrial Park, Shangjie District, Zhengzhou City, Henan Province, China
-
Whatsapp +86 13526654721
-
Email: sales@carmatrolls.com
-
Address: AUX Industrial Park, Shangjie District, Zhengzhou City, Henan Province, China
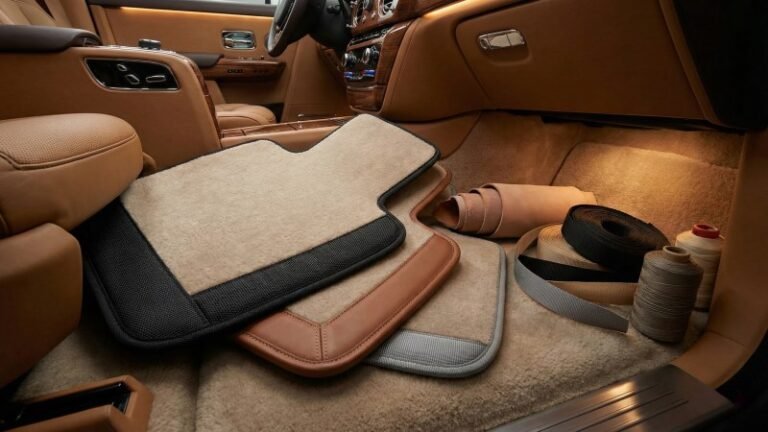
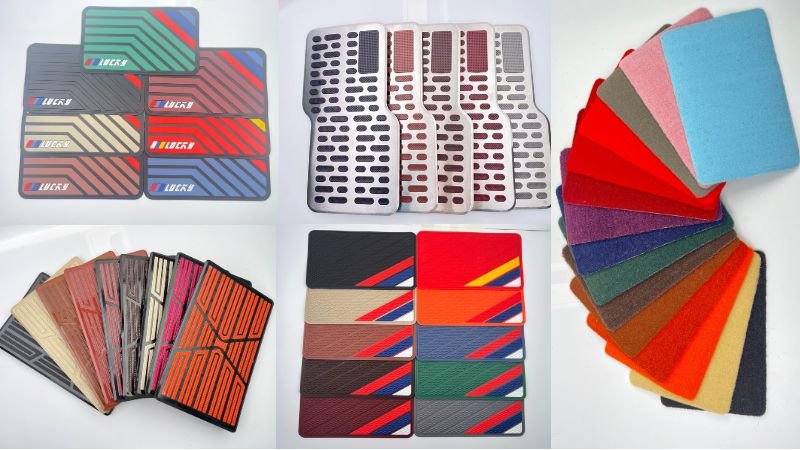
Elevate Your Car Mat Production: A Complete Guide to Essential Accessories
What are the essential accessories needed for high-quality stitched car mat production?
Essential accessories for stitched car mat production include durable heel pads (TPR or Metal), safety retention clips, secure fasteners for double-layer mats (buttons or twist locks), edge binding webbing, and custom branding elements. Selecting the right combination of these components ensures product durability, safety compliance, and premium market positioning.
Selecting the Right Heel Pads for Maximum Durability
What is the most reliable material and installation method for manufacturing long-lasting car mat heel pads?
Thermoplastic Rubber (TPR) and stainless steel are widely considered the most durable options for heel pad production. TPR offers exceptional flexibility and abrasion resistance, which prevents cracking under constant foot pressure, while stainless steel provides a rigid, premium barrier against wear. The choice between them, and whether to use heat press or screw fixation, directly dictates the manufacturing speed and the final longevity of the product.
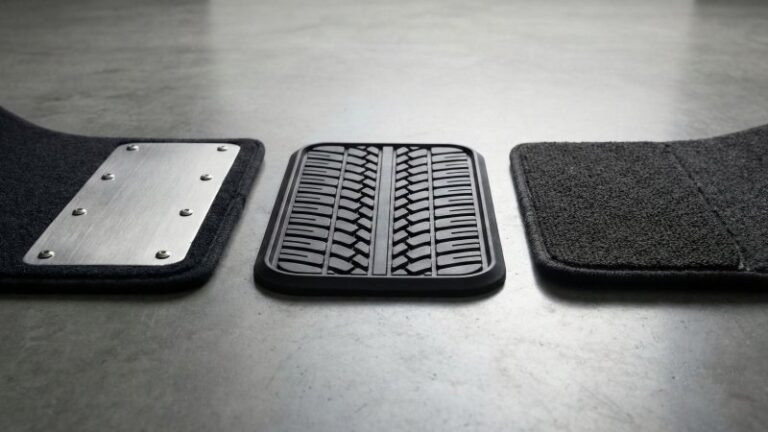
Comparing Material Options: Metal, Plastic, and TPR
The heel pad acts as the primary shield for the driver’s side mat. Without this component, the constant friction from the driver’s right heel acts like a drill bit, eventually wearing a hole through the carpet or leather surface. Therefore, selecting the correct material is not just about aesthetics; it is about mechanically extending the lifecycle of the entire product assembly.
Different materials behave differently under the stress of daily driving. You must weigh the visual appeal against practical performance data.
Material Performance Comparison
| Feature | Aluminum / Stainless Steel | Hard Plastic (ABS/PVC) | Thermoplastic Rubber (TPR) |
|---|---|---|---|
| Durability | High: Resists puncture and heavy wear. | Medium: Can become brittle and crack over time. | High: Flexible structure absorbs friction without breaking. |
| Grip | Low: Can be slippery when wet unless textured. | Medium: Often features raised patterns for traction. | High: Naturally grippy, preventing foot slippage. |
| Aesthetics | Premium: Offers a high-end, sporty industrial look. | Standard: Functional but looks less expensive. | Modern: Matte finishes look integrated and sleek. |
| Noise | High: Heels may click or scrape against it. | Medium: Some noise potential. | Low: Absorbs sound and impact. |
Metal (Aluminum and Stainless Steel)
Metal pads are often used in “sport” or “luxury” lines. They provide a rigid barrier that simply cannot be worn through by rubber shoe soles. However, metal has no flexibility. If the floor of the vehicle is curved, a flat metal pad will not sit flush. Furthermore, metal can be slippery when wet, so you must choose designs with rubber inserts or aggressive knurling (texturing) to ensure safety. For the highest corrosion resistance, manufacturers typically prefer stainless steel over untreated aluminum.
Hard Plastic (ABS or PVC)
Hard plastic is the budget-friendly standard. It is lightweight and easy to mold into complex shapes. However, rigid plastic faces a specific failure mode known as stress cracking. Just as a plastic vehicle bumper might crack upon impact, a hard plastic heel pad can split if a heavy driver pushes down on a hollow spot repeatedly.
Thermoplastic Rubber (TPR)
TPR is rapidly becoming the industry favorite for high-quality mats. It combines the durability of plastic with the flexibility of rubber. Because it is flexible, it conforms to the mat’s shape. Think of TPR like a high-quality tire tread; it is designed specifically to handle constant road friction without losing its structural integrity. It does not crack under pressure, making it the most reliable choice for reducing warranty claims.
Installation Methods: Heat Press vs Screw Fixation
Once you select the material, you must decide how to attach it to the mat. This decision affects your production line speed and the mat’s water resistance.
Screw and Bolt Fixation
This is the traditional method, primarily used for metal and hard plastic pads. It involves punching six holes through the mat material and securing the pad with screws and a backing plate.
- Pros: It is mechanical and very strong. The pad will not peel off. It gives the mat a rugged, industrial appearance that some customers prefer.
- Cons: It is labor-intensive. An operator must manually align and tighten screws. Additionally, punching holes punctures the waterproof XPE or leather layer. If the car floor gets wet, water can seep through these screw holes.
Heat Press (High-Frequency Welding)
Heat pressing is the modern standard for TPR and PVC pads. This process uses a machine to apply heat and pressure, melting the back of the heel pad slightly so it fuses directly into the fibers of the carpet or leather mat. Using a specialized car mat machine for this process ensures consistent pressure and temperature control.
- Pros: It is extremely fast. A machine can attach a pad in seconds, drastically increasing production output. It creates a seamless seal, meaning there are no holes for water to leak through.
- Cons: It requires specialized machinery. Also, the bond strength depends heavily on the compatibility of the materials. You cannot heat press metal; this method is strictly for polymer-based pads.
Note: Temperature and pressure settings for heat pressing vary significantly depending on the specific TPR formulation and the thickness of your base mat material. Always verify the recommended technical parameters (dwell time and temperature) with your raw material supplier before starting a production run to avoid scorching the mats or weak adhesion.
For high-volume production where waterproofing is a selling point, heat pressing TPR pads is generally the superior choice. However, for small-batch custom mats where a “metallic” look is required, screw fixation remains a necessary technique.
Car Mat Clips: Ensuring Safety and Stability
Why are specific retention clips essential for car mat manufacturing safety?
Car mat clips are the primary mechanical anchors that lock the mat to the vehicle’s floor pan, preventing dangerous interference with the brake and accelerator pedals. These retention systems ensure that the mat remains static during vehicle operation, complying with OEM safety standards and reducing liability for manufacturers.
Types of Retention Systems for Different Vehicle Models
Car manufacturers do not use a universal standard for floor anchors. As a mat producer, you cannot simply buy one type of clip and expect it to fit every car. To service a broad market, you must stock specific clips that match the OEM (Original Equipment Manufacturer) hardware found in the vehicle’s floor carpet.
Using the wrong clip leads to mechanical incompatibility; the mat will not lock, rendering the safety feature useless. You must identify the anchor style before production.
Common Retention System Configurations
| System Type | Mechanism Description | Typical Vehicle Compatibility |
|---|---|---|
| Twist-Lock (Oval) | An oval-shaped hole rotates 90 degrees to lock over an oval floor post. | Volkswagen, Audi, Skoda |
| Twist-Lock (Round) | Similar to the oval system but uses a circular locking mechanism. | Older VW models, Some BMWs |
| Hook & Eyelet | A simple reinforced ring (grommet) that loops over a J-shaped hook on the floor. | Toyota, Lexus, Subaru, Honda |
| Snap-Post (Press) | The clip presses down onto a ball-stud or upright post until it “clicks.” | Mercedes-Benz, Hyundai, Kia, Ford |
| Universal Screw | A plastic screw with a clip head is manually driven into the car carpet. | Vehicles without factory-installed anchors |
Universal vs. Model-Specific Clips
Universal clips are useful for older cars that were manufactured before floor anchors became a safety standard. These usually involve screwing a plastic anchor directly into the vehicle’s existing carpet. However, for modern cars, you should always prioritize model-specific clips. Using a dedicated Volkswagen oval twist-lock for a VW Golf provides a factory-level fit that a universal clip cannot match.
Preventing Slippage on the Driver Side
The driver’s side mat is the most critical component in your entire set. If a passenger mat slides, it is an annoyance; if a driver mat slides, it is a safety hazard. The industry faced a major wake-up call during the widespread pedal entrapment recalls in the late 2000s. Since then, preventing slippage has become a legal and ethical priority for manufacturers.
The Role of the Grommet Assembly
The clip assembly, often called a grommet, typically consists of two parts: a top cap and a bottom ring. These two plastic parts sandwich the car mat material between them. This structure protects the mat from tearing. Without this hard plastic reinforcement, the soft leather or carpet would eventually rip as the driver pushes against the floor anchors.
Achieving a Secure Fit
To prevent slippage effectively, the installation of the clip itself must be precise. The hole punched into the mat must match the inner diameter of the clip perfectly.
- Too Loose: If the hole is too big, the clip will spin or rattle, making the product feel cheap.
- Too Tight: If the hole is too small, the top and bottom parts of the clip will not snap together fully, leading to failure in the field.
Note: The required punch diameter for installation varies slightly between clip manufacturers. A “standard” VW clip from one supplier might require a 28mm hole, while another requires 30mm. Always verify the exact cutting die specifications with your accessory supplier before punching your material.
Lateral Stability
The clip does not just hold the mat down; it stops lateral (side-to-side) movement. Think of this like the guide pins used in a die-cutting machine. Just as guide pins hold the material in the exact right spot for the blade, the floor clips hold the mat in the exact right spot relative to the pedals. This ensures that even during aggressive braking or acceleration, the mat never shifts forward to block the pedals.
Fastening Solutions for Double-Layer Mats
What is the most effective method for securing the upper coil layer to the base of a double-layer car mat?
The most effective fastening solution involves using rotatable twist locks or heavy-duty snap buttons specifically designed for automotive interiors. These connectors mechanically join the removable upper layer (usually PVC coil) to the fixed lower layer (leather or TPE), preventing independent movement while allowing the user to separate the layers for easy cleaning.
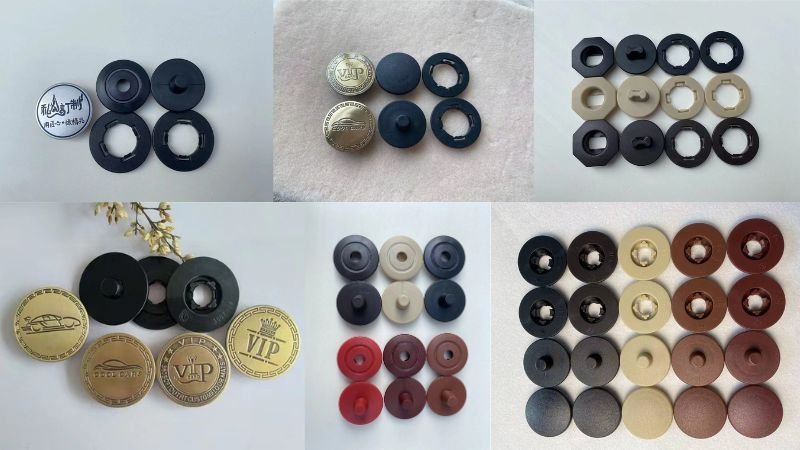
Utilizing Car Mat Buttons for Secure Layering
Double-layer car mats have become a dominant trend in the automotive accessory market. This design features a fitted leather base mat for coverage and a removable coil or carpet layer on top for trapping dirt. The critical component that makes this system work is the car mat button. Without a reliable connection, the top layer becomes a loose hazard that can slide under the driver’s feet.
The Mechanics of the Connection
The button system functions like a quick-release clamp used in industrial fixtures. It consists of two main assemblies:
- The Stud (Male): This part is permanently fixed to the bottom leather mat.
- The Socket (Female): This part is attached to the removable top layer.
When the user places the top layer down, the socket snaps onto or locks over the stud. This ensures that the top layer maintains the exact same “coordinates” as the base layer, much like a workpiece locked into a jig. This alignment is vital for maintaining the shape of the mat over time.
Material Selection: Plastic vs. Metal
Most standard buttons are made from high-strength ABS plastic. Plastic is lightweight, rust-proof, and cost-effective. However, for luxury product lines, manufacturers often upgrade to copper or zinc alloy buttons. Metal buttons offer a stronger “bite” force when installed, reducing the chance of the button ripping out of the soft coil material.
Aesthetic vs Functional Considerations for Twist Locks
While standard snap buttons rely on friction to hold the layers together, twist locks add a mechanical barrier. A twist lock typically involves an oval or rectangular turnbuckle. To release the mat, the user must actively rotate the lock 90 degrees.
Why Choose Twist Locks?
Functionally, twist locks are superior for heavy-duty applications. A standard snap button might pop open if a passenger pushes their feet hard against the floorboard. A twist lock, however, cannot be disengaged by simple pressure; it requires a deliberate turning action. This offers a higher safety factor.
The Visual Impact
Beyond function, the fastener serves as a piece of “jewelry” for the car interior. Since the top cap of the button is always visible, it plays a huge role in the perceived quality of the mat.
Design Choices for Market Positioning
| Feature | Standard Snap Button | Premium Twist Lock |
|---|---|---|
| Security | Medium: Can disengage if pulled or kicked hard. | High: Requires manual rotation to release. |
| Profile | Flush: Sits relatively flat against the mat. | Raised: Sits slightly higher due to the turning mechanism. |
| Finish Options | Usually matte black or beige plastic. | Often chrome-plated, brushed metal, or carbon fiber look. |
| Branding | Limited space for logos. | Large surface area ideal for laser-engraved brand logos. |
| Installation | Simple press fit. | Requires precise alignment of oval holes. |
For economy mats, a simple black plastic snap button is sufficient and unobtrusive. However, for high-end diamond-stitched mats, a chrome-plated twist lock acts as a visual focal point. It signals to the buyer that this is a premium, engineered product rather than a cheap, generic accessory. When selecting these components, you must balance the need for a secure hold with the visual style of the target vehicle’s interior.
Edge Finishing Techniques Using Webbing and Binding
How does the choice of edge binding material impact the longevity and market value of stitched car mats?
The selection of edge binding material, specifically the choice between Nylon and Polypropylene (PP), directly determines the mat’s resistance to fraying and UV degradation over time. High-quality webbing acts as a structural frame that prevents the multiple layers of leather and foam from delaminating, ensuring the product retains its shape and aesthetic appeal even after years of heavy foot traffic.
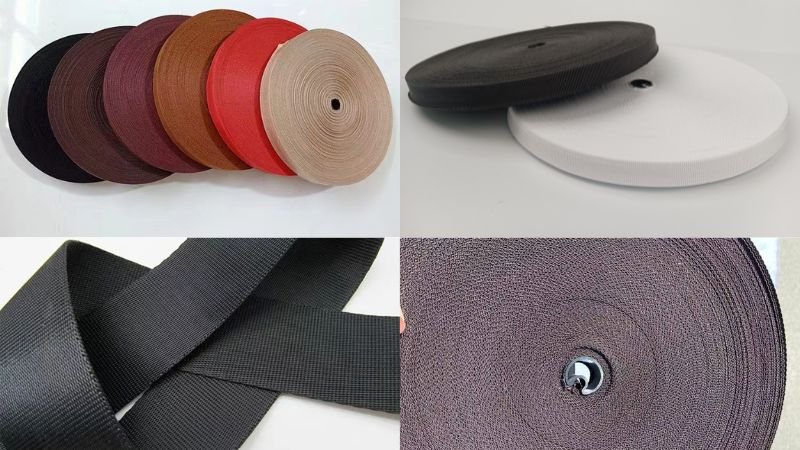
Nylon vs Polypropylene Webbing for Long-Term Wear
The edge of a car mat is the most vulnerable part of the entire assembly. It is constantly kicked, rubbed against the center console, and exposed to direct sunlight when the car door is open. Therefore, the binding strip you choose is the only barrier protecting the raw internal layers of the mat.
Understanding the Material Differences
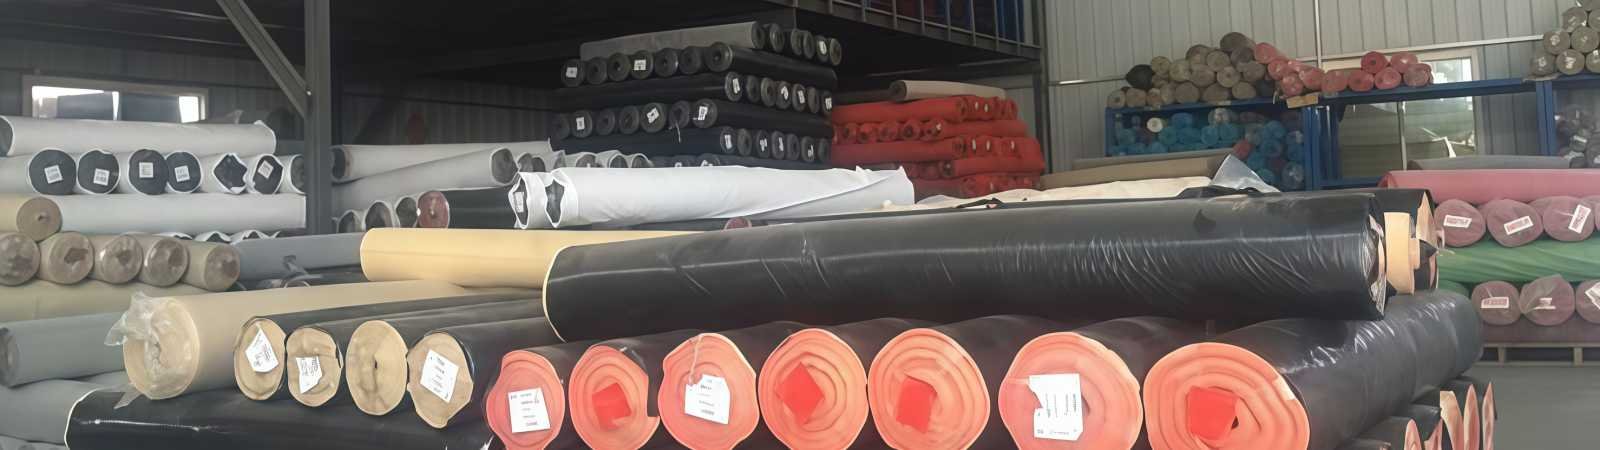
In the textile industry, not all “black straps” are created equal. You essentially have two main choices for your production line:
- Polypropylene (PP) Webbing: This is the standard choice for economy-level mats. It is rigid and cost-effective. However, PP has a rougher texture and lower heat resistance. Under intense summer heat inside a vehicle, PP fibers can become brittle and eventually crack.
- Nylon Webbing: This is the premium standard. Nylon has a much higher tensile strength and a smoother, almost seatbelt-like texture. Crucially, Nylon is far more resistant to UV rays. While a black PP strip might fade to a dull grey after a year, Nylon retains its deep color.
Note: Common widths for binding strips range from 20mm to 30mm depending on the thickness of your mat (e.g., 7mm vs. 15mm coil). Always confirm the exact width tolerance with your webbing supplier to ensure it fits your sewing machine’s binder attachment perfectly.
Comparison of Binding Materials
| Feature | Polypropylene (PP) | Nylon |
|---|---|---|
| Cost | Low (Budget-friendly) | High (Premium) |
| Texture | Rough, plastic-like feel | Smooth, soft touch |
| UV Resistance | Low (Fades faster) | High (Color fast) |
| Flexibility | Stiff (Harder to curve) | Flexible (Follows curves easily) |
| Best Use | Taxi/Fleet mats | Luxury personal car mats |
The “Frame” Analogy
Think of the edge binding like the chassis frame of a car. Just as a chassis holds all the mechanical components together, the binding holds the “sandwich” of leather, sponge, and XPE foam together. If you use a weak chassis (PP webbing), the components (mat layers) will separate, leading to a product that looks “puffy” and cheap on the showroom floor.
Color Matching Strategies for Premium Aesthetics
Once you secure the durability with the right material, you must consider the visual impact. In the B2B market, the binding color is often the easiest way to create different “trim levels” for your product without changing the expensive base materials.
The Power of Contrast
There are two primary design philosophies you can apply to your production:
- The OEM Look (Tone-on-Tone): This involves matching the binding color exactly to the leather mat (e.g., Black binding on Black leather). This is safer for conservative buyers who want the mats to disappear into the floor.
- The Sport Look (High Contrast): This involves using a bright binding color to frame a dark mat. For example, using Red Nylon binding on a Black mat immediately signals “Sport” or “Performance.” This mimics the styling cues found in high-performance vehicle seats, where stitching contrasts with the leather.
Coordinating with Stitching Thread
For a truly high-end finish, the binding must communicate with the stitching on the main surface of the mat. If you use a diamond stitch pattern with beige thread, your edge binding should ideally be the exact same shade of beige. This creates a cohesive “visual loop.”
If the binding color is slightly off—for instance, a yellow-beige binding with a white-beige thread—the human eye detects this dissonance immediately. It makes the product look like a manufacturing error rather than a design choice.
Double-Stitching for Value
A simple technique to increase perceived value is adding a decorative stitch line on top of the binding itself.
- Structural Stitch: Holds the binding to the mat.
- Decorative Stitch: A secondary line of colored thread running parallel to the edge.
This small addition consumes very little material but adds a layer of complexity that competitors with basic single-stitch machines cannot easily replicate. It visually suggests that more care and time went into the manufacturing process.
Enhancing Brand Value with Custom Logos and Decorative Connects
How can manufacturers transform generic car mats into premium branded products using simple accessories?
Custom metal nameplates and strategic decorative connectors serve as powerful branding tools that instantly elevate the perceived value of car mats. By replacing generic surfaces with laser-engraved logos and finishing joints with polished metal hardware, manufacturers create a distinct brand identity that justifies higher price points and builds customer loyalty.
Metal Logos and Nameplates for Brand Identity
In the automotive aftermarket, brand recognition is currency. A plain black mat is a commodity, but a mat with a polished metal badge is a product. The logo plate serves the same function as the emblem on a car’s front grille; it announces the identity of the maker and signals quality to the consumer.
Material Selection: Zinc Alloy vs. Aluminum
When sourcing nameplates, you generally have two material choices. The difference might look small in a photo, but it feels huge in the customer’s hand.
- Aluminum: Lightweight and cheaper to produce. It can feel flimsy and may bend if stepped on heavily.
- Zinc Alloy: Heavy, dense, and durable. It takes electroplating (chrome or gold finish) much better than aluminum. When a customer touches a Zinc Alloy badge, the cold, heavy feel communicates luxury.
Finish and Customization Techniques
You can customize these plates to match your brand’s aesthetic without creating new molds for every design.
| Technique | Description | Durability |
|---|---|---|
| Laser Engraving | Burns the logo into the metal surface. Precise and permanent. | High: Will not fade or peel. |
| Enamel Filling | Colored paint is filled into recessed areas of the metal. | Medium: Paint may chip over years of heavy use. |
| Epoxy Dome | A clear resin bubble is placed over a printed sticker on a metal base. | Medium: Resin can yellow under UV light. |
| Electroplating | The entire metal piece is plated in chrome, black pearl, or gold. | High: Resists corrosion and scratches. |
Installation Security
A loose logo is worse than no logo. Most high-end badges use a back-plate system with screws rather than adhesive tape. Adhesive eventually fails due to the high heat inside a parked car. Using a screw-fixed badge ensures your brand remains visible for the life of the product.
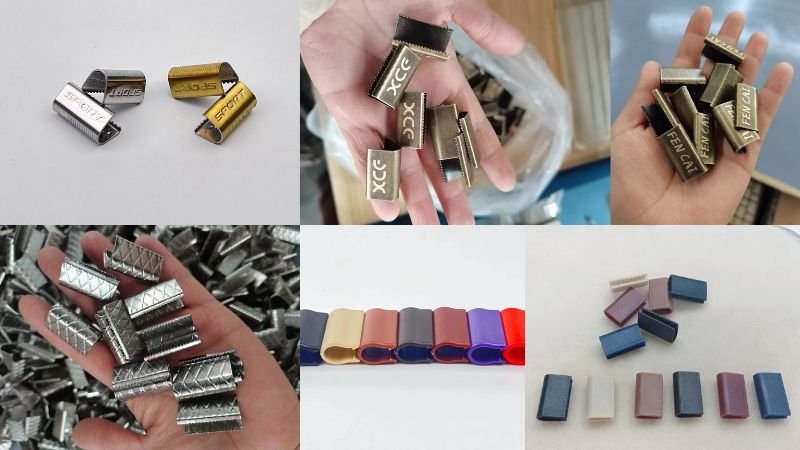
Using Connectors to Conceal Seams and Joints
Producing full-coverage “5D” or “7D” car mats presents a geometrical challenge. The raw material rolls (leather or PVC) often have a limited width, typically 1.4 to 1.6 meters. However, the floor area of a large SUV or minivan is often wider than the material roll. This necessitates splicing—joining two pieces of material together.
Turning a Flaw into a Feature
Without accessories, a seam is just an ugly line of stitching that suggests a lack of material. This looks like a defect. Decorative connectors solve this problem.
Think of these connectors like the trim overlays used on a vehicle dashboard to hide the gap between two plastic panels. They cover the necessary manufacturing joint and make it look like an intentional design choice rather than a splice.
Types of Splicing Accessories
- H-Profile Strips: These are long, flexible plastic or metal strips. The edges of the two material pieces slot into the “H” shape. This creates a waterproof seal and a clean, straight line.
- Decorative Clips: Small metal squares or rectangles placed over the seam at intervals. They look like rivets or structural bolts. This gives the mat a rugged, industrial appearance suitable for off-road vehicles.
Technical Fitment
Using connectors allows you to optimize material usage. You can use smaller off-cuts of leather that would otherwise be wasted, joining them to create a full mat. This significantly reduces your scrap rate and material costs.
Note: The internal gap of H-profile strips must match the total thickness of your car mat material (leather + sponge + foam). Common gaps are 5mm, 7mm, or 10mm.
By strategically placing these connectors, you turn a manufacturing limitation (material width) into a stylistic advantage, adding complexity and visual interest to the final product.
A Checklist for Sourcing Quality Accessories
What specific criteria must manufacturers evaluate to ensure their car mat accessories meet professional production standards?
To ensure consistent product quality, manufacturers should evaluate accessories based on material purity, finish consistency, and mechanical precision. Verifying metrics such as the use of virgin plastic versus recycled materials, the thickness of metal plating, and the accuracy of locking mechanisms prevents assembly line failures and reduces expensive post-sale warranty claims.
Key Quality Indicators to Look For
When you receive a sample batch of accessories from a supplier, you cannot rely on photos alone. You must physically inspect the components to predict how they will perform in the real world. A poor-quality accessory acts like a weak link in a chain; if it breaks, the entire car mat fails.
1. Material Purity (The “Smell and Bend” Test)
For plastic components like clips and heel pads, the raw material source is critical.
- Virgin Plastic: This is new material. It is flexible and odorless. If you bend a virgin plastic clip, it stresses white but usually holds together.
- Recycled Plastic: This is cheaper, reground material. It often has a strong, pungent chemical smell. If you bend a recycled clip, it snaps immediately because the molecular structure is brittle.
2. Mold Precision (Checking for Flash)
Inspect the edges of plastic buttons and clips. Are they smooth, or is there a thin, sharp ridge of excess plastic sticking out? This excess is called flash.
- The Cause: Flash happens when the supplier uses old, worn-out injection molds.
- The Problem: Just as a dull blade in your cutting machine leaves ragged edges on leather, a worn mold creates accessories that do not fit together. Flash can prevent a clip from locking into the floor anchor, causing the mat to slide.
3. Surface Plating Quality
For metal logos and twist locks, the finish determines longevity. A cheap “spray paint” finish looks good for a week but will peel after exposure to shoe friction.
- Salt Spray Test: Ask your supplier if their metal parts have passed a Salt Spray Test (usually 24 to 48 hours). This simulates years of exposure to humidity and road salt.
- Visual Check: Look for “pitting” or tiny bubbles on the chrome surface. This indicates a poor electroplating process that will rust quickly.
Note: Testing standards for salt spray resistance and material tensile strength vary significantly between suppliers and regions. Requesting a technical data sheet (TDS) is a standard procedure to verify these parameters.
Defect Identification Guide
| Component | Common Defect | Quick Test Method |
|---|---|---|
| Heel Pad | Cracking / Brittle | Fold the pad corner 180 degrees. It should not turn white or crack. |
| Mat Clip | Loose Fitment | Snap the top and bottom parts together without the mat. They should be hard to separate. |
| Metal Logo | Poor Adhesion | Scratch the surface with a coin. The color/plating should not flake off. |
Balancing Cost Effectiveness with Product Lifespan
In B2B manufacturing, every cent counts. However, cutting costs on functional accessories is often a “false economy.” Saving money on small parts can lead to disproportionately high losses later.
The “Weakest Link” Economics
Consider the cost structure of a car mat. You might spend $20 on high-grade leather and $10 on labor. The clip costs $0.10. If you switch to a cheaper $0.05 clip, you save $0.05 per set.
However, if that cheap clip breaks, the customer views the entire $30+ mat as “broken.” They will return the whole product. You lose the cost of the mat, the shipping, and your reputation, all to save five cents.
Where to Spend vs. Where to Save
You should allocate your budget based on the mechanical stress the part endures.
- Spend More Here (High Stress):
- Driver’s Heel Pad: It takes 100% of the abuse. A hole here ruins the mat.
- Retention Clips: These are safety-critical. Failure here is a liability.
- Buttons/Twist Locks: These are moved and clicked frequently during cleaning.
- Save Money Here (Low Stress):
- Decorative Connectors: These sit statically on the side of the mat. As long as they look good, they do not need high tensile strength.
- Passenger Side Branding: You might use a slightly thinner logo plate on the passenger side compared to the driver side if necessary, though consistency is usually better.
The Replacement Factor
High-quality accessories can actually generate revenue. If you design your mats with removable, high-quality components (like screw-on heel pads or standard twist locks), you can sell replacement parts. If a heel pad wears out after three years, the customer can buy a new pad from you instead of throwing away the whole mat. This transforms a wear-and-tear item into a sustainable, long-term product line.
Conclusion
Car mat accessories are often overlooked, yet they are the defining details that separate a basic product from a premium one. Whether it is the safety assurance provided by the right retention clip or the tactile luxury of a zinc alloy logo, each component plays a critical role in customer satisfaction. By prioritizing quality materials and precise fitment in your accessories, you protect your brand reputation and ensure your manufacturing line produces stitched car mats that stand the test of time.