-
Whatsapp +86 13526654721
-
Email: sales@carmatrolls.com
-
Address: AUX Industrial Park, Shangjie District, Zhengzhou City, Henan Province, China
-
Whatsapp +86 13526654721
-
Email: sales@carmatrolls.com
-
Address: AUX Industrial Park, Shangjie District, Zhengzhou City, Henan Province, China
How to Maintain Your CNC Car Mat Cutter for Long Life: A Complete Guide
How can you effectively maintain your CNC car mat cutter to ensure it delivers precise cuts and operates reliably for years to come?
Maintaining a CNC car mat cutter requires a structured routine of daily cleaning, weekly mechanical lubrication, and proactive management of consumable parts. By systematically draining pneumatic lines, calibrating guide rails, replacing worn blades, and monitoring control cabinet temperatures, operators can prevent costly mechanical failures, minimize production downtime, and dramatically maximize the overall lifespan of the cutting equipment.
Standardized Maintenance Schedules
What exactly goes into a standardized maintenance schedule for a CNC car mat cutter?
A standardized maintenance schedule for a CNC car mat cutter requires systematic daily debris removal, weekly lubrication of linear guide rails, and monthly dimensional calibration. Following this structured routine prevents premature mechanical wear, maintains consistent cutting accuracy, and significantly extends the machine’s overall operational lifespan.
Daily Cleaning and Visual Inspections
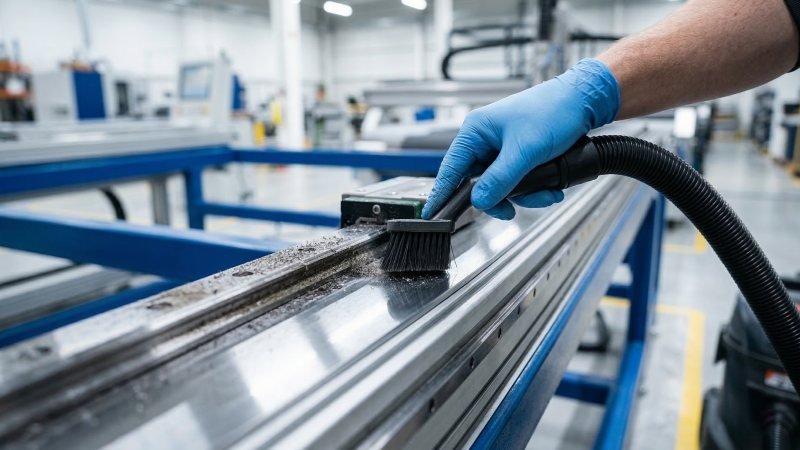
Dust and thick fabric fibers are the ultimate enemies of precision machinery. Want to watch your machine lose its accuracy in under a month? Didn’t think so. That makes daily cleaning absolutely mandatory.
Operators must use an industrial vacuum to clear debris from the main cutting area. On top of that, you’ve got to clear those gantry tracks every single shift. Leaving car mat fibers and TPE debris on the guide rails creates severe excess friction. The result? Your servo motors end up working twice as hard to fight that drag.
Before you even hit the start button on a production run, do a quick visual walk-around. Check the pneumatic air hoses for visible kinks. Verify that all photoelectric safety sensors remain completely clear of physical obstruction.
Daily Inspection Checklist
| Maintenance Task | Target Area | Expected Outcome |
|---|---|---|
| Vacuuming | Cutting bed & rails | Prevents material buildup and friction. |
| Visual Check | Air hoses & cables | Prevents sudden pressure drops or shorts. |
| Sensor Wipe | Safety beams | Ensures operator safety during cutting. |
Weekly Lubrication of Guide Rails and Gears
Friction destroys metal components over time. Because of this, greasing your moving parts every week isn’t just a suggestion—it’s completely non-negotiable.
You must focus directly on the linear guide rails and the rack-and-pinion transmission. Apply a light, even coat of high-quality grease to these specific surfaces. The exact grease viscosity, often NLGI Grade 2 lithium grease, can vary based on your factory’s temperature and humidity. Always verify the precise grease specifications with your machine supplier to prevent system clogs.
Once the grease is on, grab the heavy gantry and physically run it back and forth manually. This simple action distributes the new lubricant evenly across the internal bearings. Without proper lubrication, these steel bearings will overheat quickly. Give it enough time, and they’ll seize up solid, taking your expensive guide rails down with them.
Monthly Calibration and Deep Dusting
Over time, continuous rapid machine movements cause slight mechanical shifts. Are your car mats suddenly coming out with uneven or jagged edges? This usually indicates a critical loss of machine calibration.
Every month, operators must strictly calibrate the machine’s overall squareness. You cannot rely on eyesight alone for this task.
The Diagonal Calibration Test
To test the machine’s accuracy, cut a large 1000mm x 1000mm square out of scrap material. Then, measure the two diagonals with a precision tape measure. If the diagonal measurements differ by more than 0.5 millimeters, the gantry requires immediate mechanical realignment.
Beyond the geometry check, you need to deep-clean the entire steel chassis every month. Wipe down all structural support beams thoroughly. Remove any stubborn grime buildup near the drive systems using a mild industrial solvent. Getting rid of that embedded dirt is the only way to stop structural corrosion before it starts.
Managing Cutting Consumables and Accessories
How do you effectively manage the high-wear consumables on your cutting equipment?
Effective consumable management requires monitoring blade tip degradation, regularly inspecting and replacing the permeable felt cutting mat to ensure a flat surface, and systematically clearing the vacuum pump filters to maintain optimal material hold-down pressure. Proactively replacing these specific wear parts directly prevents costly material waste and guarantees sharp, accurate cuts.
Identifying Blade Wear and Replacement Timing
The oscillating knife blade is the most heavily used consumable on your machine. That means it needs your constant attention. When a blade dulls, it stops slicing cleanly. Instead of a clean cut, it starts chewing and dragging those tough car mat fibers. Ever seen what a dull end mill does to a surface finish? It’s the same nightmare here.
Using a dull blade on thick carpet or TPE forces the tool head to work harder, leaving frayed edges and potentially overheating the oscillating motor. Bottom line: inspect that blade daily.
Look closely at the very tip of the tungsten carbide blade. Does it look rounded or chipped under a magnifying glass? If so, you must replace it immediately. Generally, a standard blade can cut between 5,000 and 10,000 meters of material. However, this lifespan varies wildly based on whether you are cutting soft PVC, rigid TPE, or thick carpet. Always verify the expected blade lifespan and specific angle requirements (such as 16°, 26°, or 45° blades) with your tooling supplier to optimize your cutting parameters.
Indicators for Immediate Blade Replacement
| Visual Sign | Cutting Result | Required Action |
|---|---|---|
| Micro-chipped tip | Snagged fabric threads | Replace blade |
| Discolored metal | Burn marks on TPE edges | Reduce speed, replace blade |
| Rounded cutting edge | Incomplete bottom cuts | Replace blade |
Inspecting and Replacing the Felt Cutting Mat
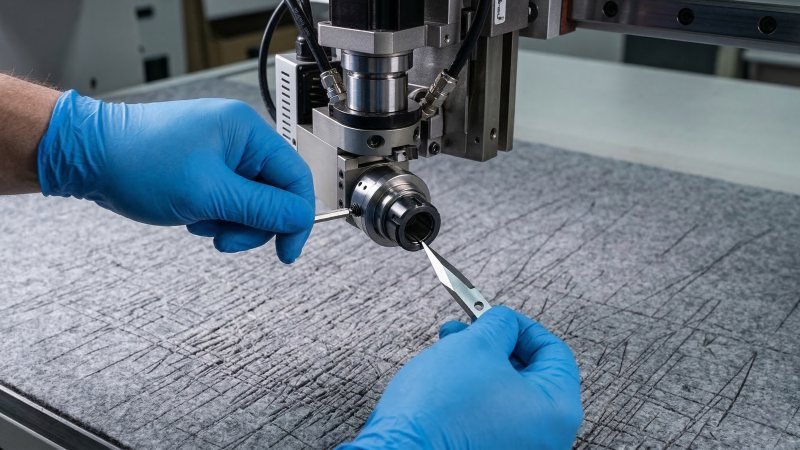
The permeable felt cutting mat serves two critical purposes. First, it allows the vacuum suction to pull the material flat. Second, it protects the expensive aluminum table beneath it.
During normal operation, the blade must penetrate the felt slightly. Typically, it should only cut 0.1mm to 0.5mm deep into the mat. Over time, however, these thousands of tiny cut lines create a rough, uneven surface and severely reduce the mat’s air permeability. When the surface loses its vacuum grip, your car mat material will not sit flat. When that happens, your blade is going to skip the low spots, leaving you with ruined patterns and a pile of scrap material.
Listen closely: unlike rigid MDF spoilboards on CNC routers, you must never use a milling bit to resurface a soft felt mat. Think a spinning cutter will just shave the top off? It won’t. It will instantly grab those dense fibers, tearing the entire mat and potentially causing a dangerous motor stall or fire hazard. Instead, when cut marks become too dense and vacuum pressure drops, the standard and only safe procedure is to replace the felt mat entirely. Some machine models may allow you to shift or flip the mat to utilize a fresh section before a full replacement is necessary.
Replacement Frequency
You should visually inspect the felt mat weekly. Once the overall thickness drops below its safe operating threshold or the surface becomes heavily scarred, you must completely replace the mat to maintain adequate vacuum hold-down pressure and cutting precision.
Clearing Vacuum Pump Filters for Maximum Suction
Your CNC cutter uses a powerful vacuum pump to hold the car mats securely in place. If the material shifts even one millimeter during a cut, the entire floor mat is ruined.
That makes maximum suction absolute life or death for your production run. The vacuum system relies heavily on air filters to keep fabric dust out of the pump impellers. When these filters clog with fabric dust, the airflow drops dramatically, compromising the hold-down force.
To maintain proper suction, you must clean the primary dust canister weekly. Don’t stop there—grab an air nozzle and blow the fine dust out of the pleated paper filters.
Industry data shows that a clean filter system should maintain a vacuum pressure reading between -30 kPa and -40 kPa. If your gauge reads closer to -20 kPa, your filters are likely blocked. Always check the vacuum gauge before starting a large batch of thick carpet mats. By keeping the filters clean, you ensure the material never slips during aggressive cutting patterns.
Preventive Care for Mechanical and Electrical Systems
How do you protect the mechanical and electrical systems of your CNC car mat cutter from unexpected failure?
Proactive maintenance of your CNC car mat cutter requires draining moisture from the pneumatic system daily, verifying drive belt tension to prevent slippage, and keeping the electrical control cabinet cool. Executing these specific preventive steps stops internal rust, guarantees precise gantry movement, and prevents expensive circuit board blowouts, ensuring long-term equipment stability.

Draining Moisture from the Pneumatic Air Compressor
Many CNC car mat cutters use a pneumatic oscillating tool head. This tool requires a constant supply of compressed air. When air is compressed, it naturally creates heat. As the air travels through the hoses and cools down, condensation forms.
If this water enters your machine’s pneumatic valves, it washes away essential factory lubricants. Worse yet, it rusts out the internal metal cylinders, quickly destroying the delicate internal seals of the oscillating knife.
Here’s the fix: drain that air compressor tank every single day. Open the petcock valve at the bottom of the tank at the end of every shift. Let the pressurized air blow the liquid water out completely.
While you’re at it, keep an eye on the water trap bowl located on the back of the cutting machine. Empty this bowl before it reaches the halfway mark. Pneumatic tools typically require a steady air pressure between 0.6 and 0.8 MPa. Always reference your machine’s manual for specific limits to prevent blowing out sensitive pneumatic seals.
Testing Drive Belt Tension and Alignment
The X and Y axes of your gantry are likely driven by steel-reinforced polyurethane belts. Over months of rapid acceleration and deceleration, these belts will naturally stretch.
When a belt becomes too loose, it creates “backlash.” Backlash means the motor turns, but the gantry hesitates for a fraction of a second. A loose drive belt on your cutter causes mismatched and inaccurate car mat edges, especially on complex curves. On the flip side, over-tighten that belt and you’ll crush the delicate bearings inside those expensive servo motors.
You must test the belt tension every single month.
The Deflection Test Method
To test the tension, press down firmly on the longest unsupported span of the belt using your thumb. The belt should typically deflect about 5 millimeters under moderate pressure, though you should check your specific manual for precise figures based on your gantry weight.
Spotting excessive wear on just one edge of the belt? You’ve got an alignment issue. The drive pulleys are not parallel. You must realign the motor bracket immediately to prevent the belt from snapping mid-cut.
Inspecting the Control Cabinet for Heat Dissipation
The electrical control cabinet is the brain of your CNC car mat cutter. Inside, it houses the motherboard, servo drivers, and power supplies. These electrical components generate significant heat during a standard 8-hour shift.
Electronics hate heat. And let me tell you, they despise static-charged synthetic fabric dust even more. Keeping that cabinet cool and sealed isn’t just best practice—it’s survival.
Start by checking the exhaust fans on the cabinet doors weekly. Hold a piece of paper near the fan grill. The fan should pull the paper flat against the plastic guard. If the airflow is weak, the internal filter sponge is clogged with fabric dust. Remove the sponge and wash it out with warm water.
Monthly Cabinet Inspection Checklist
| Component | Inspection Task | Risk if Ignored |
|---|---|---|
| Cooling Fans | Check for unusual grinding noises. | Overheating and driver burnout. |
| Filter Sponges | Wash or replace clogged sponges. | Trapped heat inside the cabinet. |
| Wire Terminals | Gently tug wires to check for looseness. | Electrical shorts from machine vibration. |
One last thing: don’t ever run the machine with the electrical cabinet doors wide open. Think popping the doors is a smart shortcut to cool things down? It’s not. It completely bypasses the filtered cooling system and acts like a vacuum, pulling static-charged fabric dust directly onto your sensitive circuit boards. Always keep the doors locked and rely on clean filters for proper heat dissipation.
Conclusion
Keeping your CNC car mat cutter in top shape doesn’t require a Ph.D., but it does demand consistency. By strictly adhering to standardized daily and weekly cleaning schedules, closely monitoring the lifespan of your cutting consumables, and prioritizing preventive electrical and mechanical care, you will dramatically extend the life of your equipment. A proactive approach prevents minor mechanical wear from escalating into a major production breakdown. By treating your machinery with care, you protect your investment and ensure flawless cutting results for years.